How To Install WordPress In DirectAdmin Using Softaculous
This guide explains in detail how to set up DirectAdmin using the Softaculous WordPress installer. Whether you’re new to WordPress or a seasoned pro, you’ll find everything you need to know here to have your site up and operating in no time.
1.Login to your control panel
Go to your control panel (e.g. cPanel, Directadmin, etc) login page and enter the correct login details.
Now look for Softaculous icon in the control panel as shown in the screenshot below. Click on the Softaculous icon which will take you to the Softaculous enduser panel.

2.Select WordPress
Once you are on the Softaculous enduser panel, you will need to search for WordPress as shown in the screenshot below.

This will take you to the WordPress page, click on the Install button here which will display the install form.
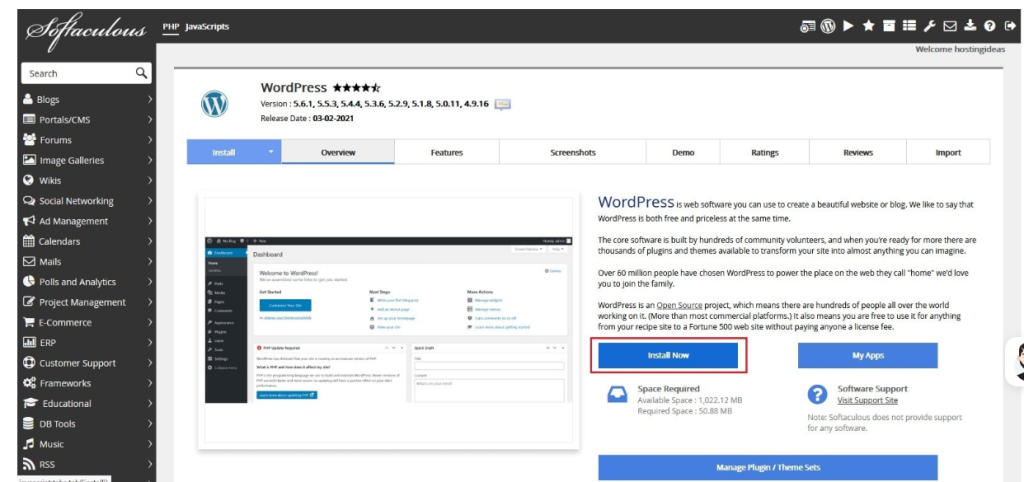
3. It will open the installation details page. From the Choose the version you want to install field, select the latest WordPress version as you get the latest features and it also offers latest security measures.
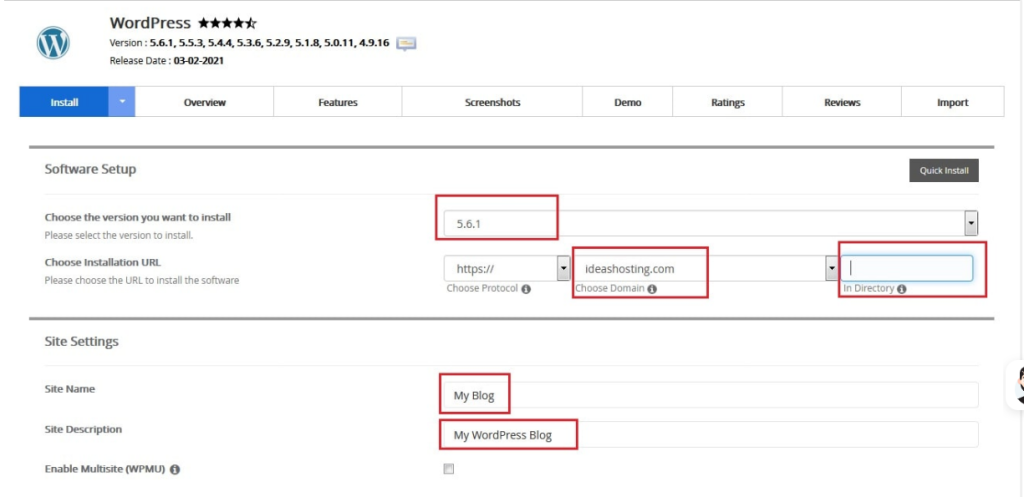
4. Then select the domain from the Choose Installation URL field and keep In Directory field empty. Add the Site Name and Site Description as per your preference.
5. Next enter the Admin Username, Admin Password and Admin Email.
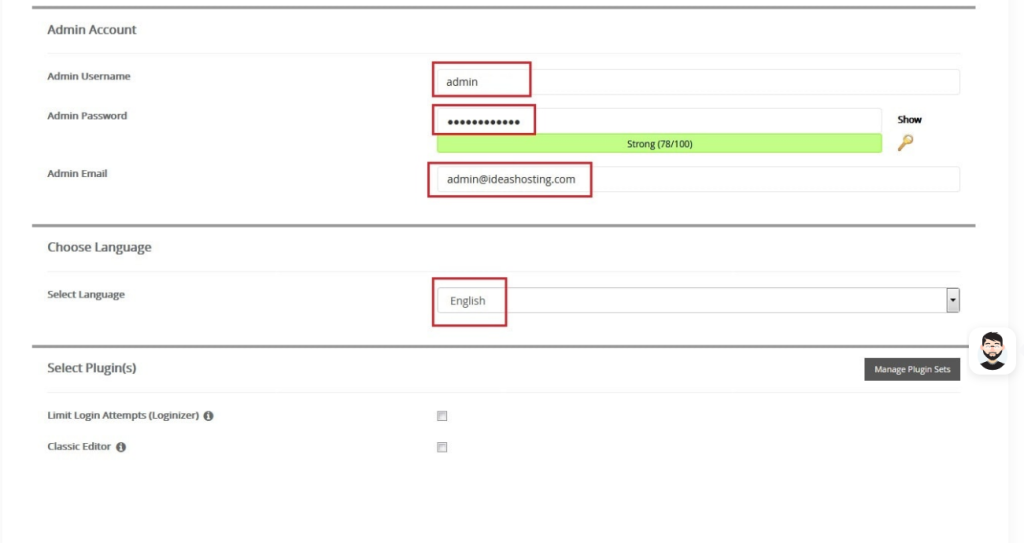
6. Select the language from the Select Language drop-down.
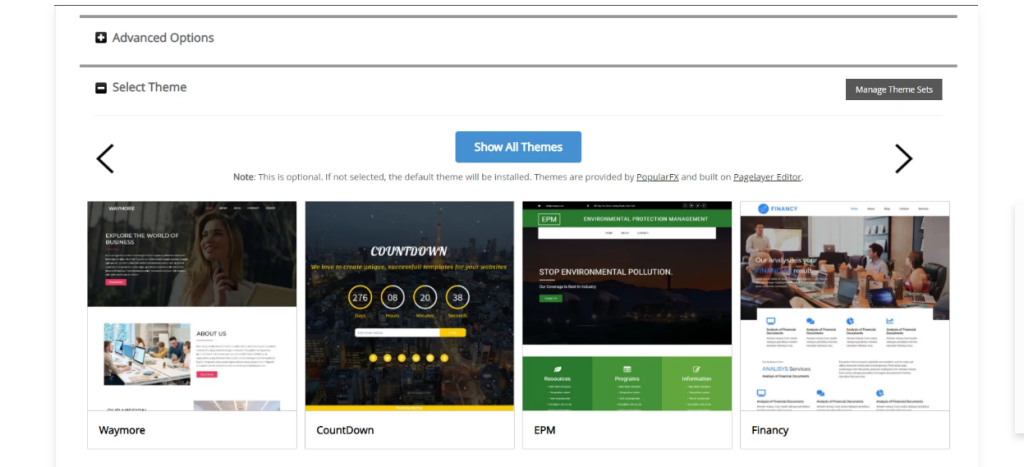
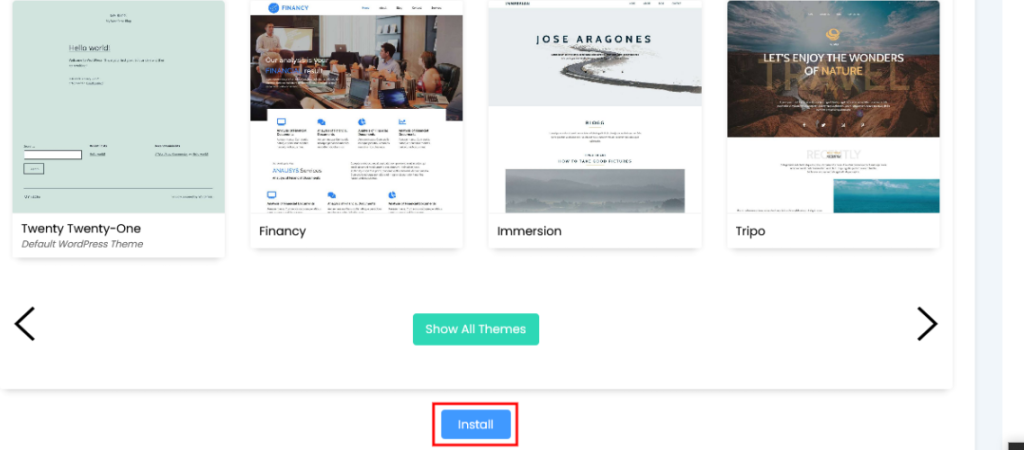
7. Select your theme from the Select Theme section.
8. In the Email installation details to field enter the email address on which you want to receive the installation details.
9. Next, click on the Install button.
10. Once the WordPress gets installed, you will get a success message as below:

Also Read:- How to add new domains in DirectAdmin