A multi-master cluster for MariaDB, Galera uses synchronous replication to replicate data. Using Galera, each node in the cluster may be a master and write to any other node simultaneously. Galera’s active design lacks failover, enhances load balancing, and fault tolerance.
This tutorial will examine how to set up a Galera cluster with three nodes running CentOS 7 and MariaDB. To provide complete redundancy, at least three nodes are required. If two nodes were utilized to construct a Galera cluster, and one node went down ungracefully, the other node would fail to function.
We have Two Nodes (server) :
192.168.1.11
192.168.1.12
Step 1:
On both servers, need to configure the MariaDB server.
First, we will add Mariadb Respository to each node and create a repo file.
vim /etc/yum.repos.d/MariaDB10.1.repo

Add the following repository information to each nodes:
# MariaDB 10.1 CentOS repository

# https://downloads.mariadb.org/mariadb/repositories/

[mariadb] name = MariaDB

baseurl = https://yum.mariadb.org/10.1/centos7-amd64 gpgkey=https://yum.mariadb.org/RPM-GPG-KEY-MariaDB gpgcheck=1

Now install the MariaDB package on all Nodes using the below command:
yum install MariaDB-server MariaDB-client MariaDB-common -y

Restart the mariadb on each node by using the command:

systemctl restart mariadb
Step 2:
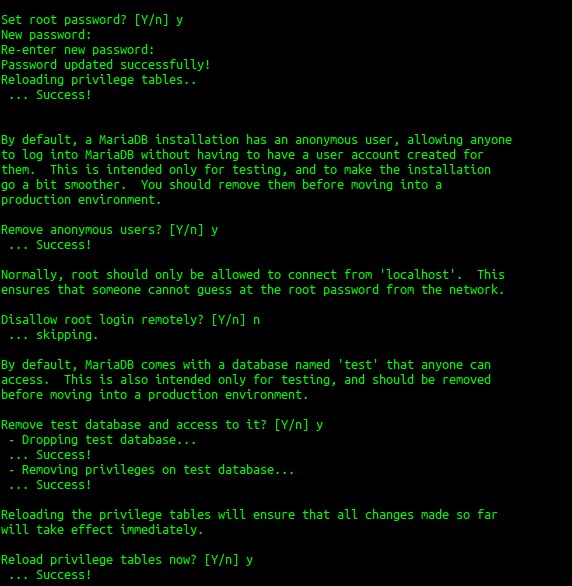
After packages are installed, we are going to secure MariaDB using the following command on each node. Do not Forget to allow remote login:
mysql_secure_installation

Galera can use Rsync to perform the replication between cluster nodes. So we need to install both Rsync using the below command:
yum install rsync -y
Database has been configured. Now, let’s move forward to Configure MariaDB Galera Cluster
Step 3:
Galera Master Node Configuration:
Lets configure one node ( 192.168.1.11 ) with Galera before joining additional nodes. We need to add the following configuration to MariaDB configuration file in /etc/my.cnf.d/server.cnf under [galera] section:
binlog_format=ROW default-storage-engine=innodb innodb_autoinc_lock_mode=2 bind-address=0.0.0.0 wsrep_on=ON

wsrep_provider=/usr/lib64/galera/libgalera_smm.so wsrep_cluster_address="gcomm://192.168.1.11,192.168.1.12"

# Galera Cluster Configuration wsrep_cluster_name="galeracluster1"

# Galera Synchronization Configuration wsrep_sst_method=rsync

# Galera Node Configuration wsrep_node_address="192.168.1.11" wsrep_node_name="galera1"
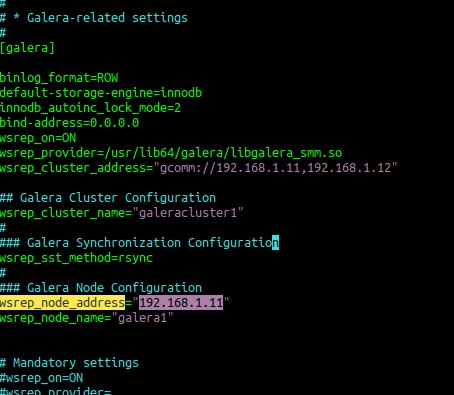
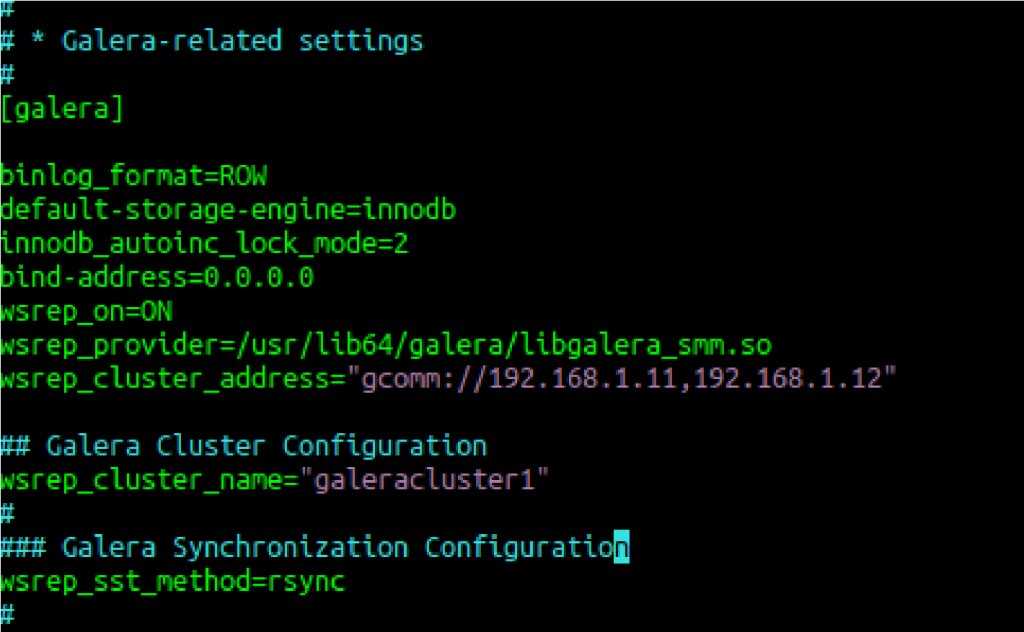
The same content needs to be copied to another node (192.168.1.12) to be joined to the cluster except the node_address and node_name
binlog_format=ROW default-storage-engine=innodb innodb_autoinc_lock_mode=2 bind-address=0.0.0.0 wsrep_on=ON

wsrep_provider=/usr/lib64/galera/libgalera_smm.so wsrep_cluster_address="gcomm://192.168.1.11,192.168.1.12"

# Galera Cluster Configuration wsrep_cluster_name="galeracluster1"

# Galera Synchronization Configuration wsrep_sst_method=rsync
We need to add a log location for MariaDB. Add the following log location under the [mysqld] section on each node:
log_error=/var/log/mariadb.log
Since the log file does not exist, we will create it as follows:
touch /var/log/mariadb.log
chown mysql: mysql /var/log/mariadb.log
Step 4:
Create Galera Cluster on the first node.
We are now ready to create the cluster on 192.168.1.11. Keep in mind that do not run the cluster creation command on more than one node.
galera_new_cluster

Verify the MariaDB running with right port 3306 and cluster with 4567 using this command:
netstat -tulnp

after that, restart the MariaDB on the first node (192.168.1.11)
systemctl restart mariadb
Step 5:
Verify the Galera Master Node:
mysql -u root -p
SHOW STATUS LIKE 'wsrep_cluster_size';
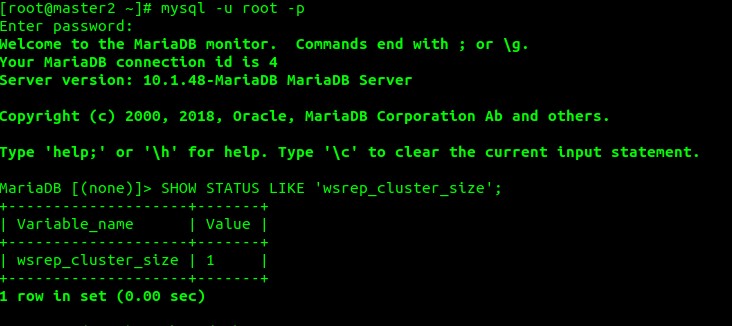
As we can see from the cluster size, there is only one member node in the cluster which is the primary master node we just configured
Step 6:
Add additional nodes to Galera Cluster
Follow this Step to add the content of [galera] section on second node (192.168.1.12). Only change the value for node address and node name respectively:
wsrep_node_address="192.168.1.12" wsrep_node_name="galera2"
The wsrep_node_address is the IP address of the node being configured, and the wsrep_node_name is the name of that node. After adding each servers configuration file, we can start or restart MariaDB.
Step 7:
Run the following command on the second node:
galera_new_cluster
After this, you can restart the MariaDB service on nodes:
systemctl restart mariadb
To check the total Custer Size, you can use the below command:
SHOW STATUS LIKE 'wsrep_cluster_size';
We have configured two nodes as a Cluster.
Step 8:
Testing replication on Galera Cluster
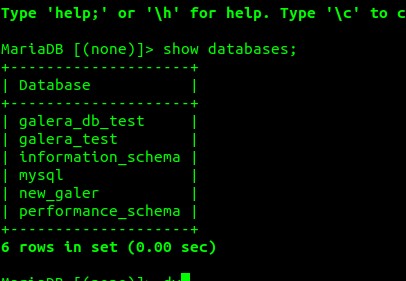
We can test the replication between cluster nodes are functioning as expected by creating a test database on one node and viewing the database list on another node. The test database should be on all the nodes if replication is working properly. We are going to create a test database named ‘galera_db_test’ on node 1. create database galera_db_test;

Database has been created. Now you can verify on all nodes that replication is working by using this command in MySQL:
show databases;
Galera cluster has been configured.