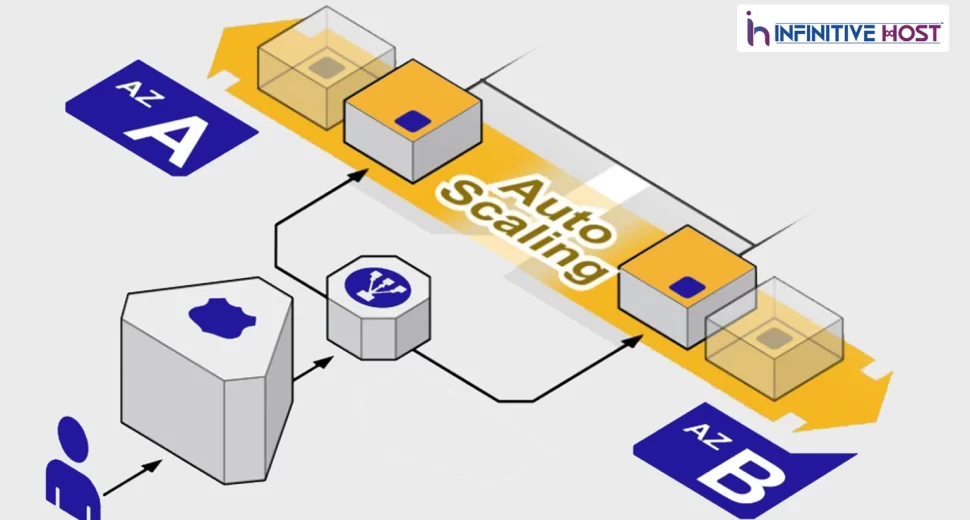
Although today’s computing resources are more affordable than ever before, this does not mean that they are free. Renting insufficient resources puts your application at danger when faced with significant traffic, while renting an excessive amount of resources amounts to paying for resources that you would only use infrequently if at all. This is the very issue that can be remedied by utilising auto scaling.
Auto scaling gives you the freedom to add or remove capacity from your resource group in real time in response to changing demand. This is especially useful if your traffic fluctuates significantly from day to day.
You essentially do not need to worry about the volume of traffic; all you have to do is establish the minimum and maximum thresholds, and the system will take care of managing the resources that are necessary.
What does auto scaling offer to customers?
Auto scaling provides customers with an automated method to raise or reduce the amount of compute, memory, or networking resources they have allocated, depending on the demand that is caused by traffic spikes and other use patterns.
Without auto scaling, resources are fixed into a certain configuration, which gives a fixed value for memory, processing power, and networking. This value does not increase in response to rising demand and does not decrease in response to falling demand because it does not adjust automatically.
Cloud computing implementations in the present era absolutely require auto scaling to function properly. Elastic resources are applications and infrastructure that may be called on as needed to meet demand. The fundamental concept behind cloud computing is to give customers the ability to pay only for the resources they actually use. This is made possible in part through elastic resources.
In accordance with the requirements of your organisation, automatic scaling can be configured to maximise either performance or costs, or both, through the implementation of suitable scaling plans, which we will go over in a moment.
At point, the benefits of using auto scaling for any application are obvious:
-
Optimum performance
-
Optimum cost
-
No scaling overheads
How does auto scaling work?

Instead of being a feature, auto scaling is better thought of as an automatic process that takes into account three components, each of which needs to be manually established during the setup process. This procedure takes into consideration auto scaling. The following are the three components:
Grouping for Auto Scaling
A group is the collection of all of the EC2 instances on which your application is now operating. Because all of these instances share similar features, they are handled as a logical group for the purposes of scaling and administration of the instances. To put that another way, when we discuss automatic scaling, a group is the component that specifies what should be scaled.
Launch Configuration
The Launch Configuration serves as the template for launching EC2 instances that is used by Scaling Groups. Instance type, a key pair, one or more security groups, AMI ID, and a block device mapping are some of the pieces of information that are included in this file.
It is important to point out that even though you can use the same launch configuration for any number of scaling groups, each scaling group can only have one launch configuration total. This is the case despite the fact that you can use the same launch configuration for any number of scaling groups.
In addition, if you want to modify the launch configuration that a group uses, you will need to initiate the launch of a group upon the preferred launch configuration before you can make the modification. This means that you are unable to make changes to the launch configuration while instances are active.
When considering the bigger picture, the launch configuration is what determines what and how to scale.
Auto scale plan
You may recall that it is possible to configure auto scaling in order to maximize either performance or costs, or both. Your selections will be saved here once you’ve finished making them. If you have many instances of your application running, for example, you have the option of increasing the number of instances to improve performance, decreasing the number of instances to reduce expenses, or configuring particular settings to address both concerns simultaneously. It basically dictates the timing of scaling as well as the process.
You can choose to set the benchmark for when instances should be created or terminated based on either the utilisation of the central processing unit (CPU), the utilisation of the network, the performance of the disc, or the reads and writes to the disc, or you can choose a combination of these factors.
How to Auto Scale?

Let’s get down to the specific details of how auto scaling is actually done now that we understand what auto scaling is and how it operates. As you probably have guessed by now, we are going to begin by first building a launch configuration, then creating an auto scaling group, and finally checking to see if our group has begun with the specified number of instances.
You have successfully created your launch configuration, and a wizard will now be provided to you so that you can make an Auto Scaling Group. After the amount of time that you defined in the Scaling policy, you will notice that a new instance is operating. It is set to three hundred seconds by default. Additionally, you have the option to select Instances from the navigation pane. It displays both instances that have been terminated and those that are running.
So, in this article you will get to know about the auto-scaling mechanisms and how it works with various configuration patterns to save cost.


